
This post will go through the process of installing and testing Redis local installation in a virtualbox environment on Ubuntu 18.04. Redis is a key/value style in memory database for caching web applications and reducing overall page load times, eg. for expensive sql queries, or frequently visited pages. The process is similar with memcached (another cache server technology), however Redis is more current so for that reason I will be using it instead. There is also option to use ‘Simple Cache’ which uses python standard dictionaries, however this method is apparently not thread safe and so would not be suitable for production.
Installing Redis
Update the apt package cache followed by installation command.
sudo apt update

sudo apt install redis-server
Setting up redis service to auto restart
I’d like the Redis service to run automatically upon system reboot. First open the configuration file located in /etc/redis/ path.
sudo nano /etc/redis/redis.conf
Change the line
#supervised no
to
supervised systemd
Save changes in nano editor by pressing control + o (write changes), enter and control + x (exit).
Restart the redis service for changes to reflect.
sudo systemctl restart redis.service
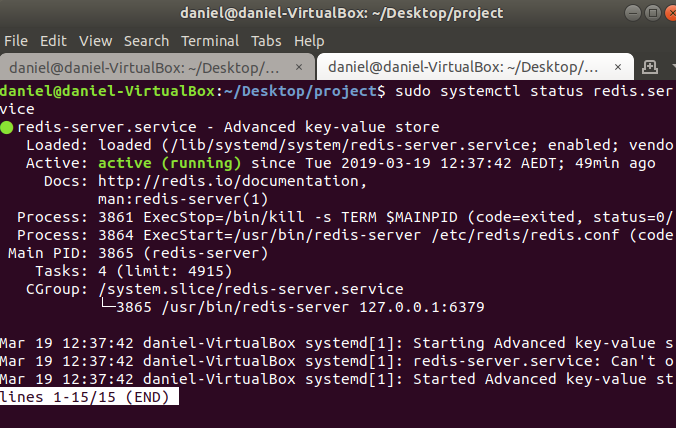
Check the status of the service with
sudo systemctl status redis.service
Verifying Redis is working by probing with ping using redis-cli.
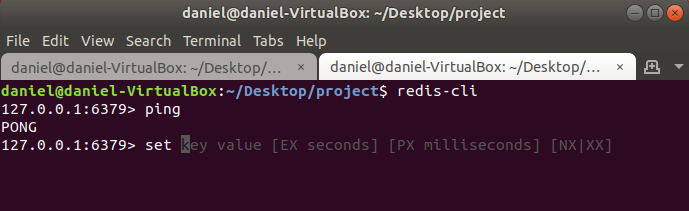 Setting and getting a key value with key “dog” and value “woof”.

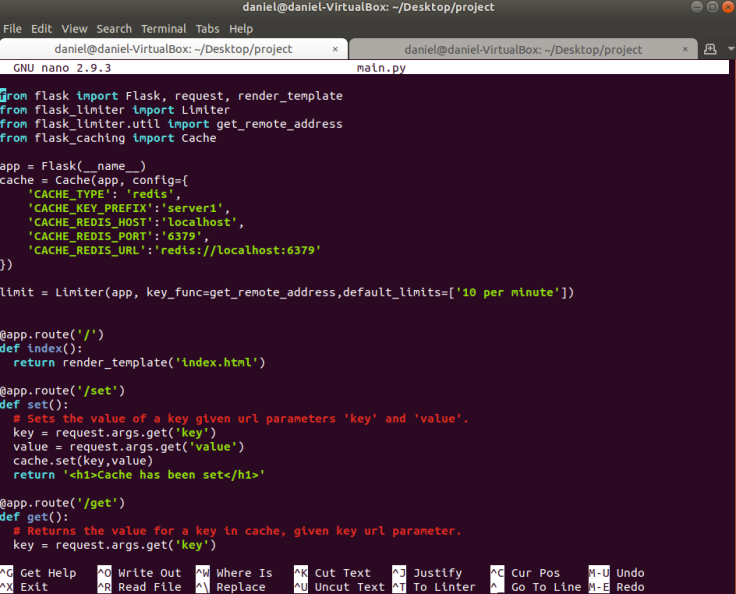
Integrating Redis with Flask
Libraries required for this are;
-
redis
-
flask
-
flask-caching
note: Ignore the flask_limiter code, its from a previous exercise.
The code
The application is simple, there are two main routes /get and /set. /set route accepts two url parameters and accesses them through request.args.get() method. After accessing them it will set the cache in Redis. The /set route accepts a key and attempts to retrieve the value. In practice you would need to include error handling, this is the bare minimum to get Redis working with Flask, keep that in mind if you’re building this application.
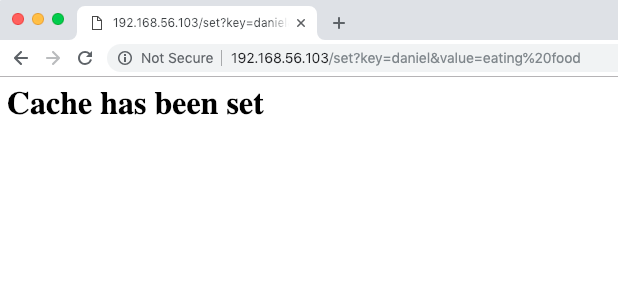
Testing
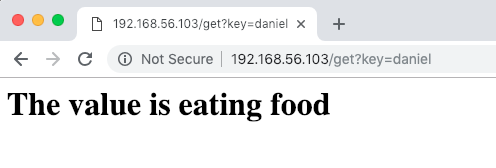
Accessing the application in browser, I can set using the url parameters, likewise I can retrieve using the url parameters.
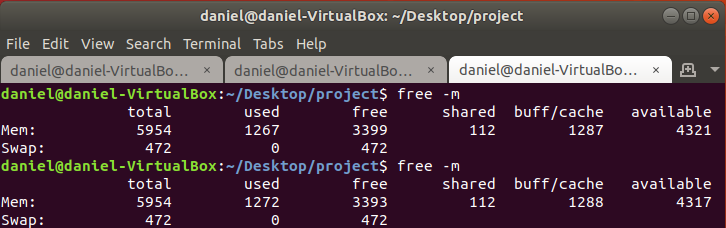
Memory
To view available ram type free -m in terminal. Before setting 1,000 keys available memory is equal to 4321 MB. After setting 1,000 keys the available memory falls to 4317MB indicating 4-5MB was used. After the keys expire the available space frees up.
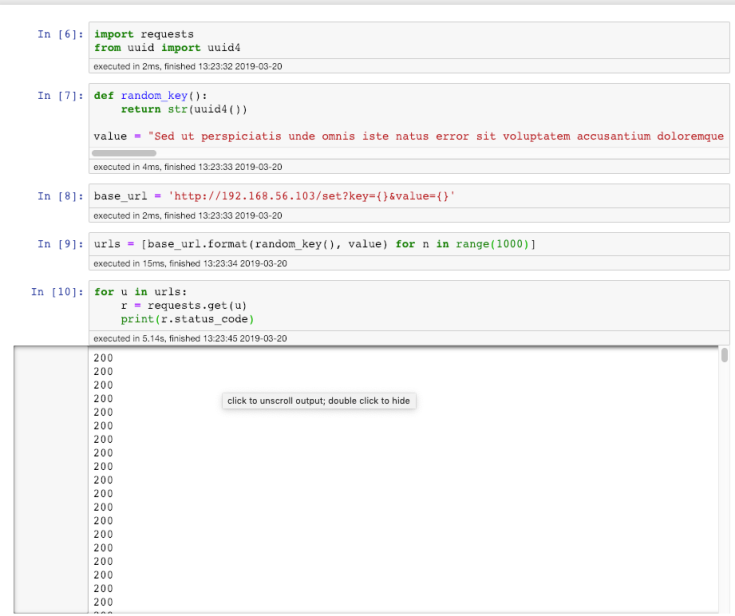
Using python’s requests module, one can test setting a large amount of keys via a loop through the /set route by passing in a random key using uuid4 and an arbitrary value.

Leave a comment